Microwave Tempering
Mess free, quick and easy, perfect for when using a small amount to decorate. Good even for small quantities of shells or bars.
Equipment
- Microwave
- Heat gun
- Wooden stick
- Heatproof bowl
- Ramekin
- Thermometer
- 100g Chocolate bar mould
- Baking parchment
Ingredients
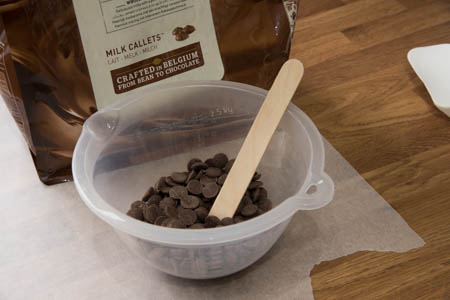
- Milk chocolate callets150g
- Cocoa butter callets20g
I’ll show you how to make the very simplest bar of milk chocolate, by using the microwave tempering method. I’m using 40% cocoa solids Belgian chocolate for here, and actually the simplicity of the chocolate taste is sometimes all you need for a luxurious treat.
-
Put 100g of the chocolate into the plastic bowl, and heat on medium power in a microwave for one minute, then take it out and give it a stir.
We're leaving 50g of chocolate to one side in the ramekin (you'll see why soon). Heating like this gets things started gently. I use a wooden spoon for stirring this because then I don’t need to remove it from the bowl when I microwave it again.
-
Heat the contents again for 1 minute, on low power this time. Take it out and stir it. You should be seeing the chocolate has melted a little now. Do the same again (heat and stir).
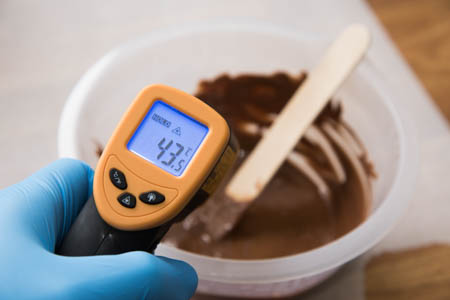
Check the temperature (I used a laser temperature gun) after this. You are aiming for a temperature of 46-48C at this point.
-
If it needs more heat, just heat again for at most 30 seconds at a time to avoid burning it. Stir each time before you check the temperature, to ensure the chocolate is melted evenly. Allow the chocolate to cool just a little, to approx. 40C.
I find 3 or four heating attempts is enough to reach the right temperature. You’re going to add more of the remaining chocolate callets to the chocolate to seed it. If you do this too early, it can knock the new ones out of temper right away and it can cause a streaky result.
-
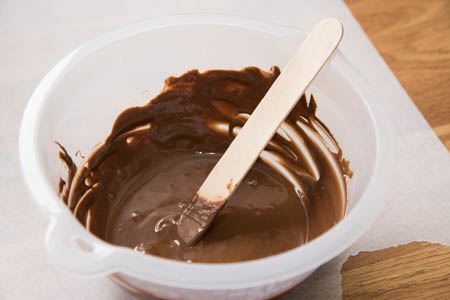
Shake in about ½ of the remaining chocolate (about 25g). This is known as seeding. Immediately stir it. Allow it to rest a moment and then stir again, slowly.
You’re now aiming for a temperature of roughly 30C, which will be ideal for working with. If you’re not there yet, add just a few more callets and stir again.
-
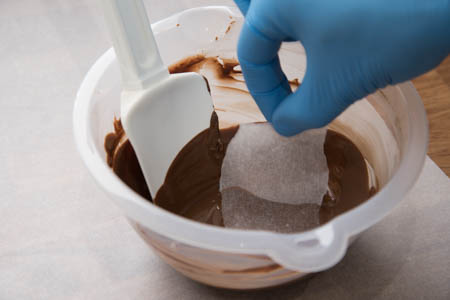
When you reach 30C, you should find your chocolate is now in temper. You can test this by tearing off a strip of baking parchment and dipping it in on one side. Rest this carefully on your work surface.
While you're waiting for it to set, continue to carefully stir the chocolate. Don't go mad here. If you stir to quickly, you'll be putting air into it, and you don't want that because bubbles will appear in your chocolate bar.
-
The paper on the left in this image was dipped before the seeding (when at 46C). The one on the right shows the post seeded and cooled chocolate (when at 30C).
Notice how wet the left one is. Clearly not in temper, it is not suitable for making our chocolate bar. The other one has set and is curling up at the edges. This is ideal and is a result of the contraction effect of cooling tempered chocolate.

-
If you find that it didn't work, and the chocolate doesn't set or has streaky white marks, don't worry! You can heat to 46C and try again.
Nothing is wasted, as long as you kept reasonable control over the temperature. You may need to get a little more chocolate callets for seeding. Add them to your ramekin and repeat the steps above.
-
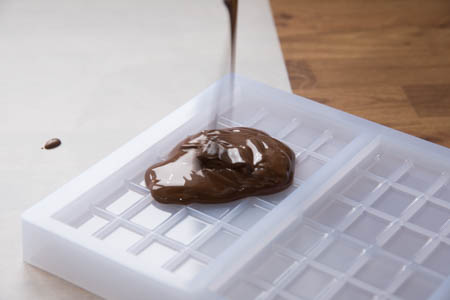
When you have tempered chocolate, quickly take your heat gun and gently heat the chocolate bar mould by passing some warm air over it evenly. Try to get it to approx 26-30C. Pour the chocolate into the mould, then tap it hard on the work surface for about 20 seconds or so to remove any air bubbles.
Applying the heat like this means that when the chocolate goes into the mould, it won't set immediately. If it did, you'd be likely to trap any air bubbles in it. Use the laser thermometer to get in the correct temperature range, but be careful not to overdo it and to not create hot areas on the mould. This would throw the chocolate you add out of temper.
-
Allow it to cool and set at room temperature (for approx. 30 minutes). Once it appears to be set, put it in a fridge for 15 minutes. Remove from the fridge and allow to return to room temperature before removing it from the mould onto a cool flat surface.
Using the fridge like this will encourage the chocolate to contract and more easily free itself from the mould. Allowing it to then reach room temperature before removing it will help you avoid getting condensation on the surface of your bar.

It’s really that simple. What I really like about this method is the speed and the lack of mess. After spending a while doing table tempering, I really appreciate that the cleanup is just minutes.